Homemade Pita Bread Recipe
This post may contain affiliate links (disclosure).
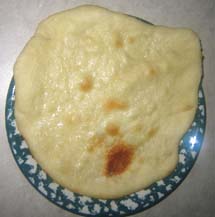
Craving soft, warm pita bread without the hassle of going to the store? This homemade pita bread recipe is the perfect solution! With just a few simple ingredients and the help of a bread machine, you can enjoy fresh, fluffy pita bread right out of your oven. Whether you’re making sandwiches, wraps, or just dipping into hummus, this easy pita bread recipe will become a staple in your kitchen.
Why You’ll Love This Homemade Pita Bread Recipe
- Easy to Make: With the help of a bread machine, the dough comes together effortlessly. You just need to shape the pita and bake!
- Fresh and Delicious: There’s nothing like the taste of fresh, homemade pita bread right out of the oven. It’s soft, warm, and has that perfect chewiness.
- Simple Ingredients: All the ingredients for this pita bread are pantry staples—no special trips to the store required.
- Versatile: These pitas are perfect for stuffing with your favorite fillings, dipping into hummus, or serving alongside a meal.
- Quick Bake Time: Once the dough is ready, the pitas bake in just 5 minutes, so you can have fresh bread on the table in no time.
This homemade pita bread recipe uses a bread machine to mix the pita dough. You simply put all pita ingredients in the bread machine, set it to “Dough” cycle and it will make the dough for you. Once the dough it made, you roll it into pita circles and quickly bake in a high temperature oven. That’s basically the process in a nutshell of how to make pita bread at home. Making homemade pita bread is actually simpler as it seems :)
Another great thing about this homemade pita bread recipe is that it uses the ingredients that are already on hand. So if you suddenly crave fresh warm pita bread and don’t feel like going to the store, just make the pita yourself – it will be so fresh, so hot, so delicious, and it will smell so good!
Homemade Pita Bread Recipe
Ingredients
- 1 1/8 cup lukewarm water: Activates the yeast and helps the dough come together.
- 3 cups flour: Provides the structure for the pita bread, giving it that perfect soft texture.
- 1 tbsp oil: Adds a bit of moisture and tenderness to the dough.
- 1 1/2 tsp sugar: Feeds the yeast and helps the dough rise.
- 1 tsp salt: Enhances the flavor of the pita bread.
- 1 1/2 tsp active dry yeast: Helps the dough rise and creates those lovely pockets in the pita.
Kitchen Tools You Need To Make Homemade Pita Bread
- Bread Machine: Mixes and kneads the dough, making the preparation process easy and hands-off.
- Rolling Pin: Used to roll out the dough into perfect circles for baking.
- Kitchen Towel: Covers the dough as it rests, helping it rise properly.
- Cookie Sheet: For baking the pita in the oven.
- Parchment Paper: Prevents the pita from sticking to the cookie sheet and ensures easy cleanup.
- Measuring Cups and Spoons: Essential for accurately measuring your ingredients.
Instructions How To Make Pita Bread
- Pour water and oil in the bread machine pan. Add flour on top. In one corner on top of the flour, put sugar, in another corner put salt and in the 3rd corner put yeast. Set the bread machine on “Dough” cycle and press the “Start” button.
- After the “Dough” cycle finishes, the bread machine will beep. Take out the dough and put it on a floured surface. Shape the dough into a 12-inch sausage shape. Cut the dough into 8 equal pieces.
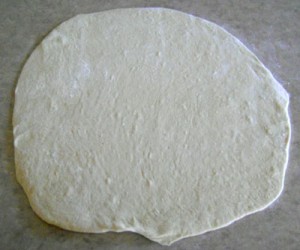
- Roll each piece of pita dough into a ball. Roll each ball with a rolling pin into a 6-inch circle. Cover the pita dough circles with a kitchen towel and let stand for 30 minutes.
- Preheat oven to 500F. Line the cookie sheet with parchment paper. Place 2 pitas on the cookie sheet and put in the oven. Bake for 5 minutes, then take the pita out of the oven and cover with a towel. Bake the remaining pitas.
Serving Suggestions
- Stuffed Sandwiches: Use these fresh pita breads to make sandwiches by stuffing them with baked falafel, grilled chicken, or roasted veggies.
- Dips: Serve the pita warm with your favorite dips like hummus, eggplant baba ganoush, or tzatziki.
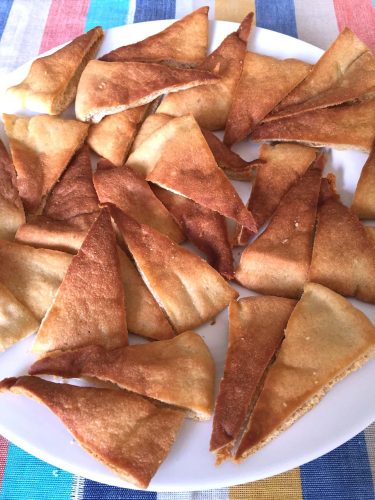
- Pita Chips: Cut the pitas into wedges, brush with olive oil, and bake for crispy homemade pita chips.
- Side Dish: Pair the pita with Middle Eastern dishes like shawarma, chicken kebabs, or a hearty chicken salad for a complete meal.
- Breakfast: Try stuffing a pita with scrambled eggs, cheese, and spinach for a quick and easy breakfast.
Tips For Success
- Check Your Water Temperature: For the best results, make sure the water is lukewarm, about 110°F. Too hot, and it can kill the yeast; too cold, and the dough won’t rise properly.
- Let the Dough Rest: After rolling the dough into circles, allow it to rest for 30 minutes under a kitchen towel. This rest time helps the pita develop that characteristic puff in the oven.
- Don’t Overflour the Surface: When rolling the dough, use just enough flour to keep it from sticking. Too much flour can make the pita dry or tough.
- High-Temperature Baking: Baking the pita at a high temperature (500°F) ensures it puffs up quickly, creating that beautiful pocket inside the bread. Keep a close eye on them, as they bake fast!
- Keep Pitas Soft: Cover the freshly baked pita with a clean kitchen towel as they come out of the oven. This traps steam and keeps the pitas soft and pliable.
Variations And Substitutions
- Whole Wheat Pita: For a healthier version, substitute half of the all-purpose flour with whole wheat flour. This will add a bit of nuttiness and extra fiber to your pita bread.
- Gluten-Free Pita: If you’re gluten-free, use a gluten-free flour blend specifically made for bread. Make sure it contains xanthan gum or another binding agent for structure.
- Herbed Pita: Add fresh or dried herbs like oregano, thyme, or rosemary into the dough for extra flavor. You can even sprinkle some sesame seeds or za’atar on top before baking.
- Garlic-Infused Pita: Brush the pita dough circles with a mixture of olive oil and minced garlic before baking for a flavorful garlic pita bread.
- Dairy-Free: This recipe is naturally dairy-free, but if you’re concerned, be sure to double-check that your flour and yeast are free of any dairy additives.
- No Bread Machine: If you don’t have a bread machine, you can mix and knead the dough by hand or use a stand mixer with a dough hook. Let it rise in a warm place for 1-2 hours before shaping.
Storage and Reheating
- Storage: Once your pita bread has cooled completely, store it in an airtight container or a resealable plastic bag. It will stay fresh at room temperature for up to 2 days. For longer storage, place it in the fridge, where it will last up to 5 days.
- Freezing: To freeze pita bread, let it cool completely, then wrap each pita in plastic wrap or aluminum foil and place them in a freezer-safe bag. Pitas can be frozen for up to 3 months. Thaw them at room temperature when ready to use.
- Reheating: To reheat pita bread, simply warm it in a preheated 350°F oven for 5 minutes or until heated through. You can also reheat pita in the microwave by wrapping it in a damp paper towel and microwaving for 20-30 seconds.
- Reviving Stale Pita: If your pita bread starts to dry out, sprinkle a little water on it and heat it in the oven or microwave to soften it up again.
Frequently Asked Questions
Can I make pita bread without a bread machine?
Yes, you can! If you don’t have a bread machine, you can mix and knead the dough by hand or use a stand mixer with a dough hook. Let the dough rise in a warm place for 1-2 hours until it doubles in size before shaping and baking.
Why didn’t my pita puff up?
Several factors could prevent your pita from puffing up. Make sure your oven is fully preheated to a high temperature (500°F), and ensure your dough has had enough time to rest before baking. Rolling the dough evenly and not too thin or thick can also affect how well it puffs.
How do I keep my pita bread soft?
To keep your pita bread soft, cover them with a clean kitchen towel immediately after they come out of the oven. The steam trapped inside will help keep them soft and pliable. Storing them in an airtight container once cooled will also help preserve their softness.
Can I freeze homemade pita bread?
Yes! Pita bread freezes very well. Once the bread is fully cooled, wrap each pita individually in plastic wrap or foil, then store them in a freezer-safe bag for up to 3 months. Thaw at room temperature when ready to use.
Can I use this dough to make pita chips?
Absolutely! After baking the pita, cut it into wedges and brush with olive oil. Sprinkle with salt or your favorite seasonings, then bake at 375°F for 8-10 minutes until crispy. Pita chips make a great snack or side for dips!
Other Easy Pita Recipes
Crispy Air Fryer Pita Bread Chips: These crunchy air fryer pita chips are perfect for dipping or snacking, and they come together in just minutes.
Quick Air Fryer Pita Flatbread Pizza: This quick and easy pita pizza made in the air fryer delivers a crispy crust topped with your favorite ingredients.
Grilled Veggie Supreme Pita Pizza with Cheese and Mushrooms: Loaded with cheese, mushrooms, and colorful veggies, this grilled pita pizza is a satisfying and healthy option.
Turkey Sausage and Feta Stuffed Pita Pockets with Peppers: These hearty pita pockets are filled with savory turkey sausage, roasted peppers, and tangy feta for a delicious meal.
Whole Wheat Pita Pocket Chicken Fajitas Recipe: Enjoy a healthy twist on fajitas by stuffing whole wheat pita pockets with seasoned chicken, peppers, and onions.
Homemade Oven-Baked Pita Bread Chips: These homemade pita chips are oven-baked to perfection, crispy, and ready for your favorite dip or snack craving.
Easy Personal Pita Cheese Pizza in 15 Minutes: This personal-sized pita cheese pizza is a quick and easy meal option that’s ready in just 15 minutes.
Homemade Pita Bread Recipe
Ingredients
- 1 1/8 cup lukewarm water
- 3 cups flour
- 1 tbsp oil
- 1 1/2 tsp sugar
- 1 tsp salt
- 1 1/2 tsp active dry yeast
Recommended Kitchen Tools (click the links below to see the items used to make this recipe)
- Kitchen towel
- Cookie sheet
Instructions
- Add water and oil to the bread machine pan. Add the flour on top.
- Place the sugar in one corner, salt in another, and yeast in the third corner on top of the flour.
- Set the bread machine to the “Dough” cycle and press "Start."
- When the dough is ready, remove it and place it on a floured surface.
- Shape the dough into a 12-inch log and cut it into 8 equal pieces.
- Roll each piece into a ball and then flatten into a 6-inch circle with a rolling pin.
- Cover the pita dough circles with a kitchen towel and let them rest for 30 minutes.
- Preheat your oven to 500°F and line a cookie sheet with parchment paper.
- Place 2 pitas on the sheet and bake for 5 minutes. Once baked, cover them with a towel.
- Repeat with the remaining pitas and enjoy your fresh, homemade pita bread!
Notes
- For best results, ensure your water is lukewarm to activate the yeast properly.
- You can bake multiple pitas at once if you have space in your oven.
Nutrition
Enjoy your homemade pita bread! If you like to bake fresh bread with your bread machine, check out bread machine cinnamon rolls recipe, oatmeal bread recipe for bread machine and soft white sandwich bread recipe.



I don’t have a bread machine so can I still use the same recipe and make it like I would regular bread dough ?
Hi Debra,
Of course you can make it without a bread machine. Just mix the dough the same way as regular bread dough.
Melanie
I made this great pita bread from your recipe, and it is truly the most phenom!!!!! Soooo easy to make, and in a small amount of time. This is going to be my family staple!!! Daughter in law requested this from me…. very impressive…. And your pumpkin cheesecake is the ULTIMATE!!!!!!!!!!!!!! Thank You……
Thank you! I’m really happy that it turned out well! It’s so nice that you shared your results!