Instant Pot Pumpkin Cheesecake Recipe
This post may contain affiliate links (disclosure).
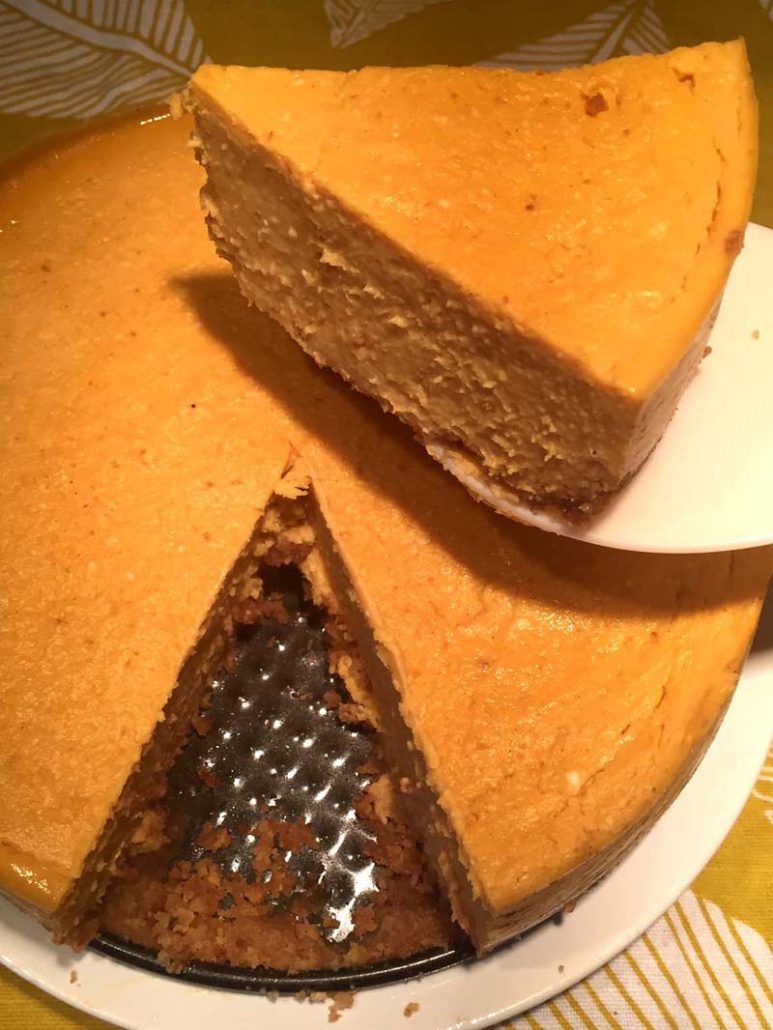
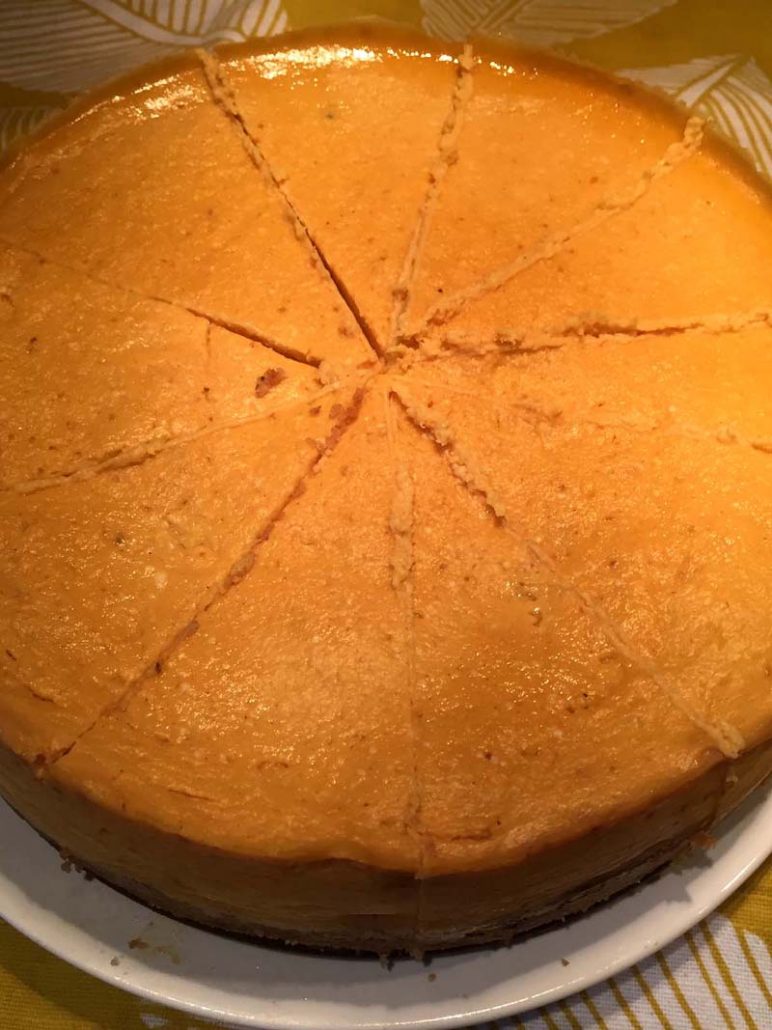
Transform your fall dessert game with an Instant Pot Pumpkin Cheesecake that’s irresistibly creamy and smooth. Bursting with the warm flavors of pumpkin and spice, it’s a guaranteed showstopper for Thanksgiving or any cozy autumn evening. Thanks to the Instant Pot, making this indulgent treat is simpler and more reliable than ever!
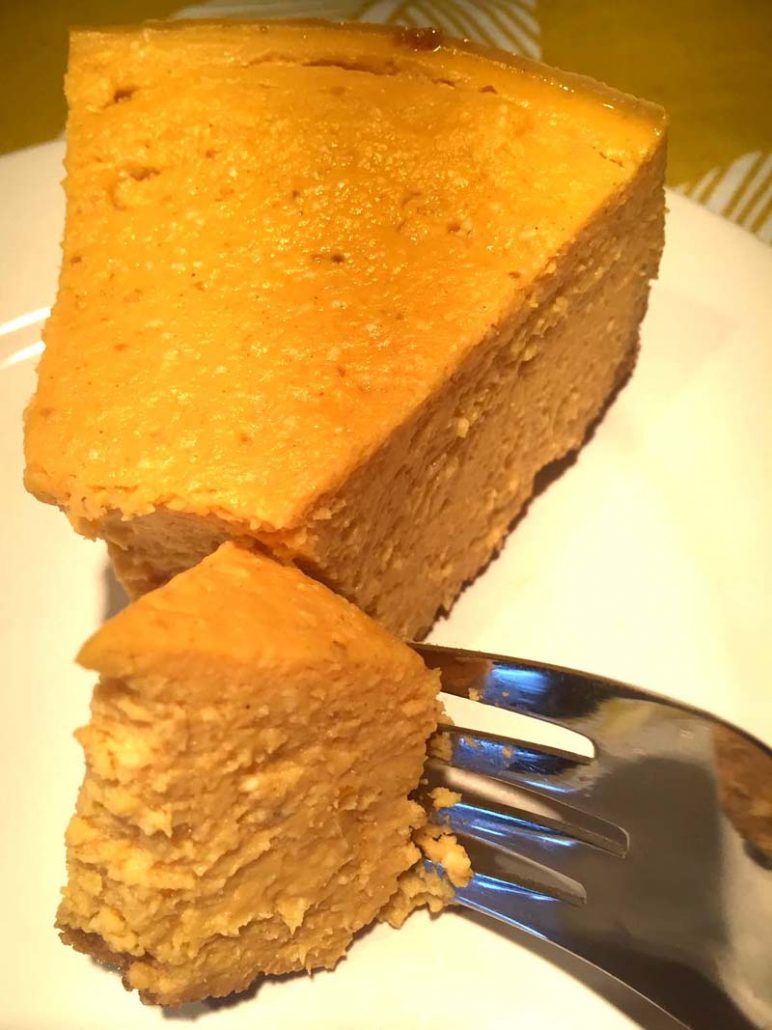
This Instant Pot pumpkin cheesecake is so creamy and smooth with amazing pumpkin flavor! This is the only pumpkin cheesecake recipe you’ll ever need!
Why You’ll Love Instant Pot Pumpkin Cheesecake
- Effortless Preparation: The Instant Pot takes the guesswork out of cheesecake making. No need to worry about cracks or uneven baking—this method ensures a smooth, flawless dessert every time.
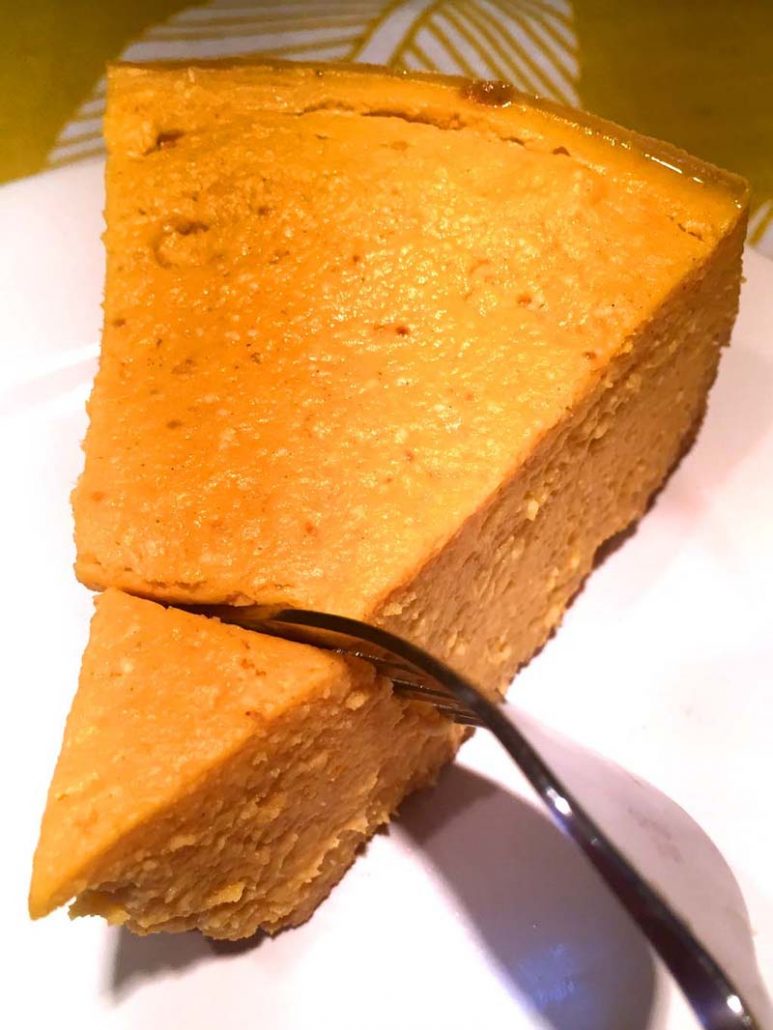
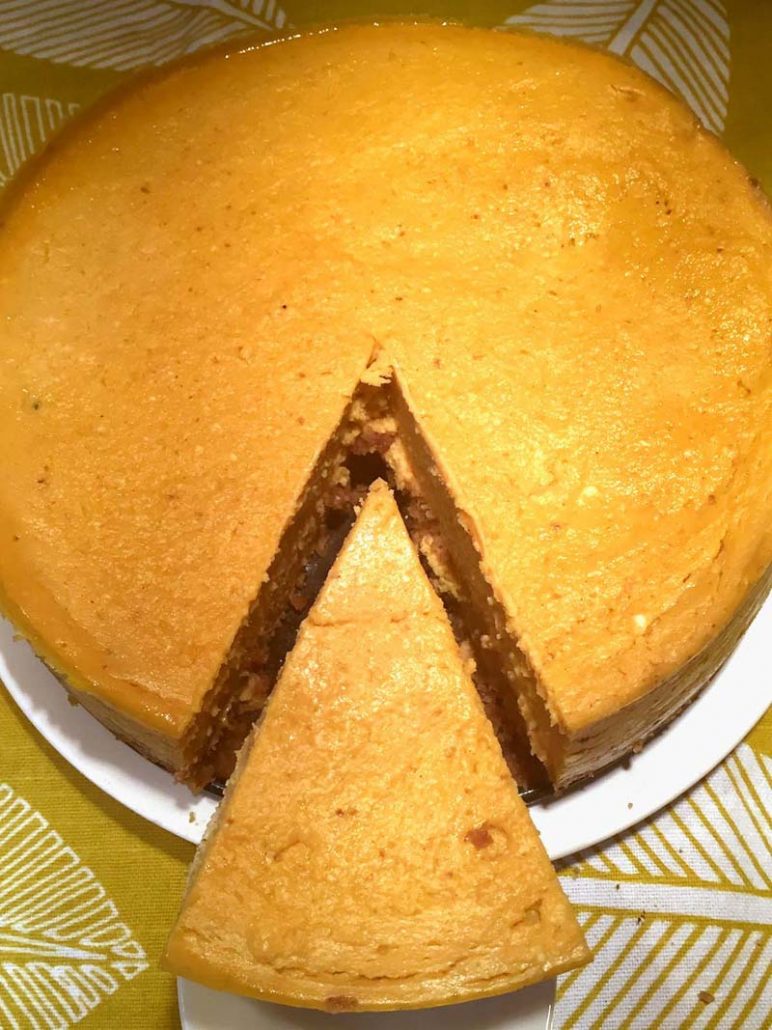
- Rich and Creamy Texture: With its perfectly blended filling and buttery crust, every bite melts in your mouth. It’s the ultimate indulgence for pumpkin lovers!
- Fall Flavor Perfection: The warm spices and pumpkin puree make it a quintessential fall treat, ideal for cozy evenings or festive gatherings.
- Foolproof and Reliable: Even first-time bakers can achieve professional results. The pressure cooking method simplifies the process and eliminates common cheesecake pitfalls.
- Versatile and Customizable: Easily adapt the recipe to be gluten-free or tweak the spices to suit your taste. It’s a recipe you can make your own!
This Instant Pot pumpkin cheesecake is an adaptation of my classic tried-and-true pumpkin cheesecake recipe to the Instant Pot. I make this pumpkin cheesecake every Thanksgiving, it always comes out perfect and everyone loves it!
Don’t own an Instant Pot? Read my article “what is an Instant Pot” to learn more about this amazing kitchen tool!
Ingredients for Instant Pot Pumpkin Cheesecake
- Graham Cracker Crumbs – Forms the perfect buttery crust for your cheesecake.
- Sugar – Adds sweetness to both the crust and filling.
- Cinnamon – Enhances the warm, fall flavors in the crust.
- Butter – Holds the crust together and adds richness.
- Cream Cheese – The base for the creamy, smooth cheesecake filling.
- Pumpkin Puree – Infuses the filling with that classic pumpkin flavor.
- Eggs – Bind the filling for a firm yet creamy texture.
- Vanilla Extract – Adds a subtle depth of flavor.
- Pumpkin Spice (or Cinnamon) – Brings out the cozy, spiced notes that scream autumn.
- Cornstarch – Ensures a stable, crack-free cheesecake.
- Water – Necessary for creating steam in the Instant Pot to cook the cheesecake evenly.
For exact measurements of these ingredients, see the printable recipe card at the bottom of this article.
Once I tried pressure cooking this pumpkin cheesecake in the Instant Pot, I’ll never go back to the oven method. Instant Pot is hands down the best way of making cheesecakes.
Making the cheesecake in the Instant Pot is so much easier than baking it in the oven! If you ever baked cheesecake in the oven, it often ends up cracked despite your best efforts, and then you have to mask the cracks with a whipped cream topping – ask me how I know :) With the Instant Pot, cheesecake never cracks, your pumpkin cheesecake top will be perfectly smooth and crack free with no effort from you whatsoever!
Kitchen Tools You Need to Make Instant Pot Pumpkin Cheesecake
- Instant Pot – The key to creating a perfectly cooked, crack-free cheesecake with ease.
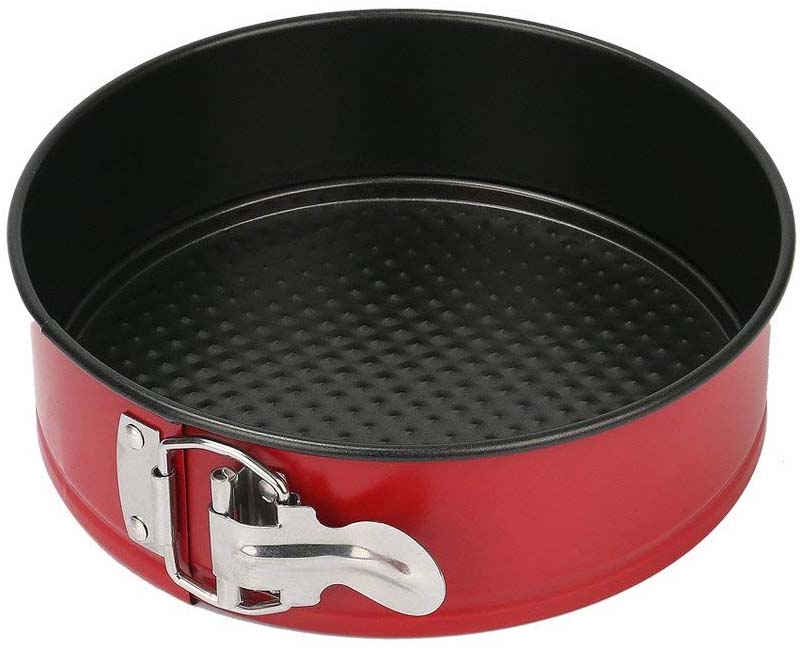
- 7-Inch Springform Pan – Fits perfectly inside the Instant Pot and holds your cheesecake while it cooks.
- Measuring Cups and Spoons – Ensure accurate measurements for the best results.
- Food Processor – Mixes the crust and filling quickly, giving a smooth and lump-free texture.
- Non-Stick Cooking Spray – Prevents the cheesecake from sticking to the springform pan.
- Trivet (Instant Pot Rack) – Supports the springform pan inside the Instant Pot, ensuring even cooking.
In order to make Instant Pot pumpkin cheesecake, you need a springform pan that fits inside the Instant Pot (regular springform pans are too bigs and won’t fit). 7-inch springform pan is a perfect size for the Instant Pot, and if you don’t own one, check out my Instant Pot springform pan article describing it in greater detail along with ordering information. This pan is a must-have Instant Pot accessory!
How to Make Instant Pot Pumpkin Cheesecake
- Spray a 7-inch springform pan with non-stick cooking spray to prepare it for the crust.
- Combine graham cracker crumbs, sugar, cinnamon, and melted butter in a food processor. Press the mixture into the bottom and up the sides of the pan, then freeze it for 5–10 minutes.
- Blend the filling ingredients (cream cheese, pumpkin puree, eggs, sugar, vanilla, pumpkin spice, and cornstarch) in a food processor until smooth and creamy.
- Pour the prepared filling into the crust, smoothing it evenly.
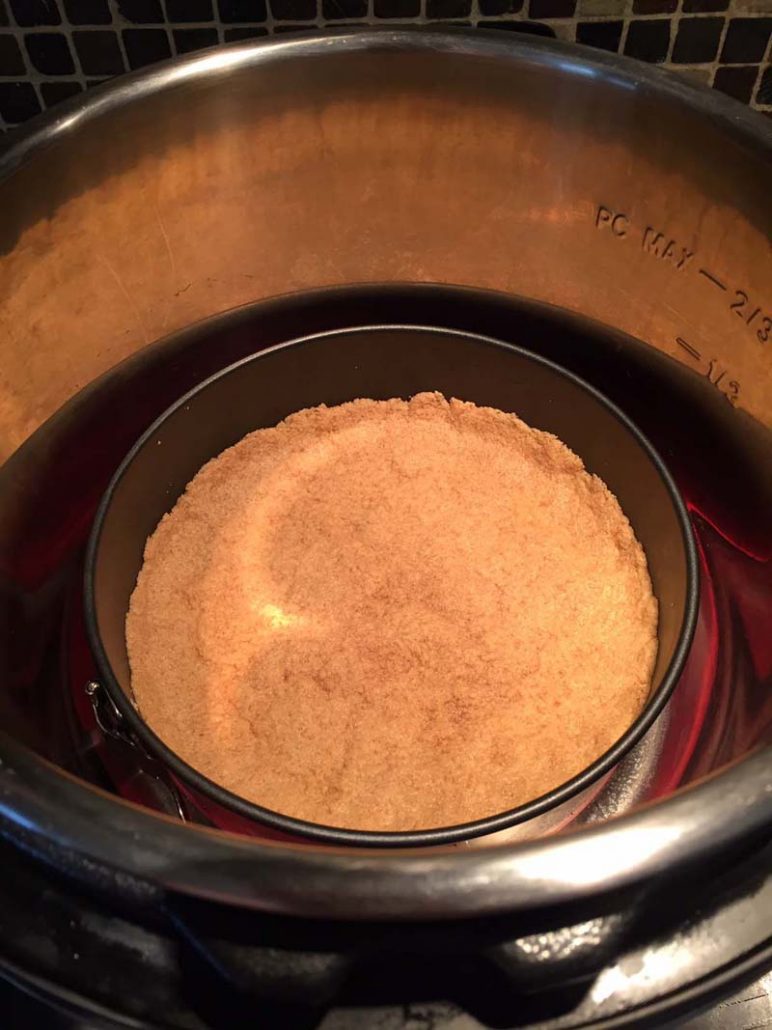
- Add water to the Instant Pot, place the trivet inside with handles up, and carefully set the springform pan on the trivet.
- Seal the lid and set the Instant Pot to cook on High Pressure for 30 minutes, followed by a 10-minute natural release.
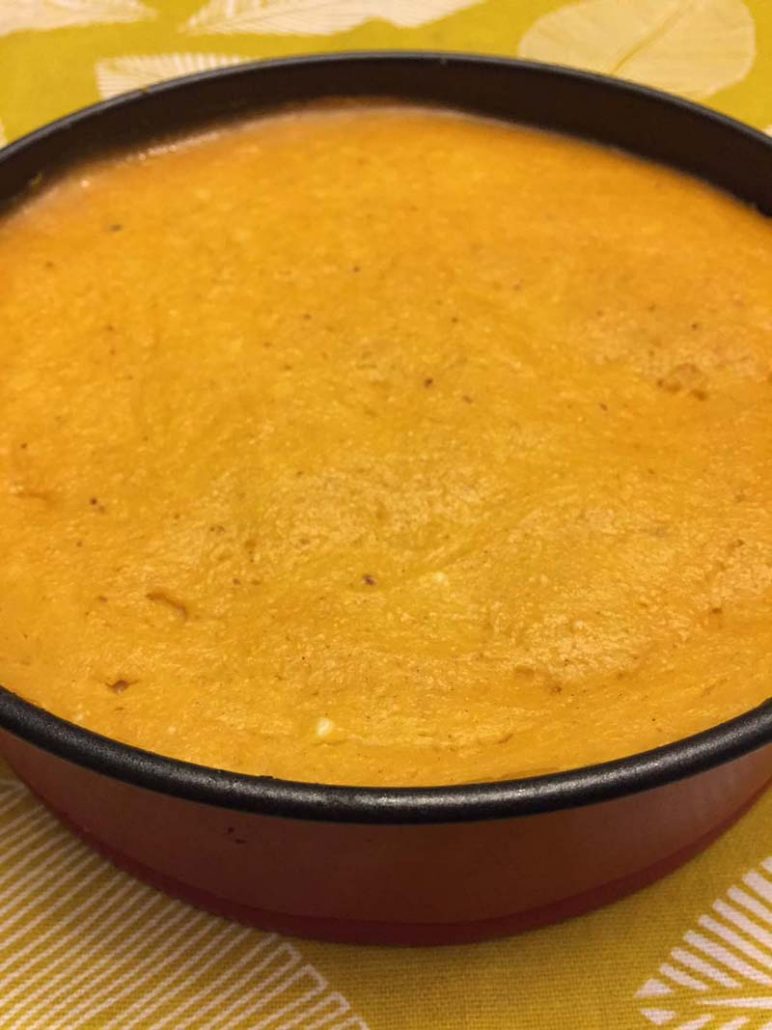
- Open the lid, carefully remove the cheesecake using the trivet handles, and let it cool at room temperature for 1 hour.
- Refrigerate the cheesecake for at least 4 hours, or overnight, before serving.
Making an Instant Pot cheesecake is very easy. First, make a graham cracker crust and press it into a 7-inch springform pan. Put the crust in a freezer while making the filling. If you’d like to pre-bake a crust in your Instant Pot, you can too! For more info, check out my Instant Pot graham cracker crust article). Then make a pumpkin cheesecake filling (this is as simple as mixing all the ingredients in a food processor), take out the crust from the freezer, pour the filling in it and pressure cook in the Instant Pot for 40 minutes, followed by 10 minutes natural release (NR) and then quick release (QR).
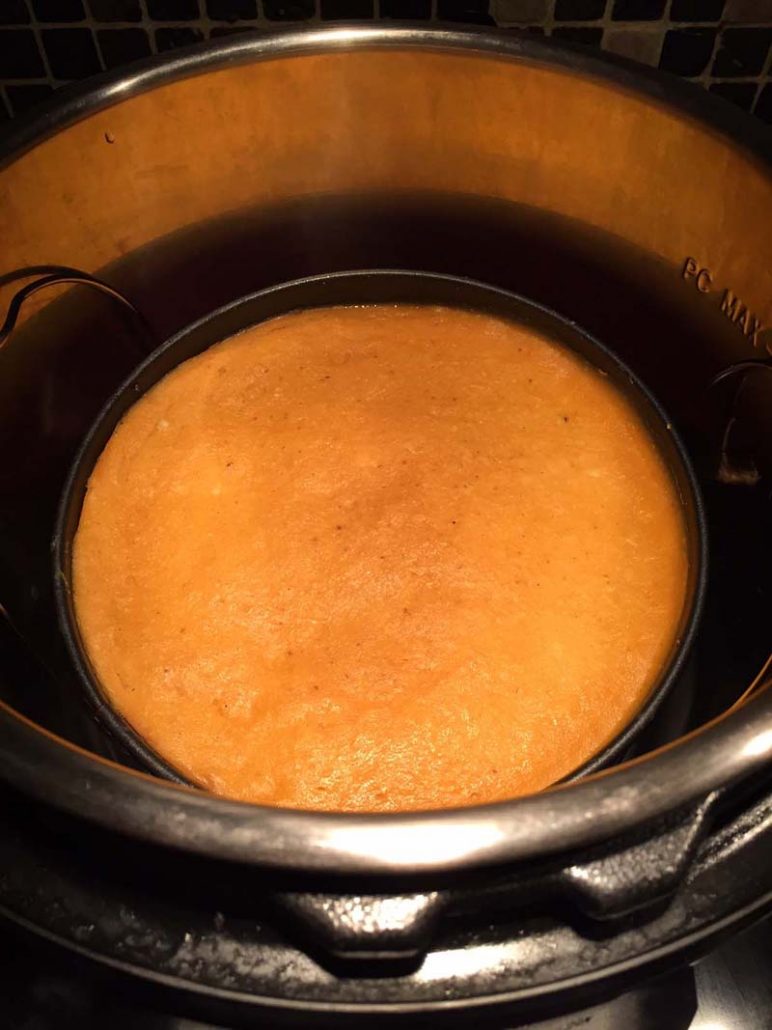
My pressure cooking setup for pumpkin cheesecake is this: 1 cup of water in the Instant Pot, then the trivet (the rack that comes with the Instant Pot) with the handles up, then the 7-inch springform pan with the cheesecake mixture on top of the trivet. Note: I don’t cover the springform with foil or any other lid when making cheesecake!
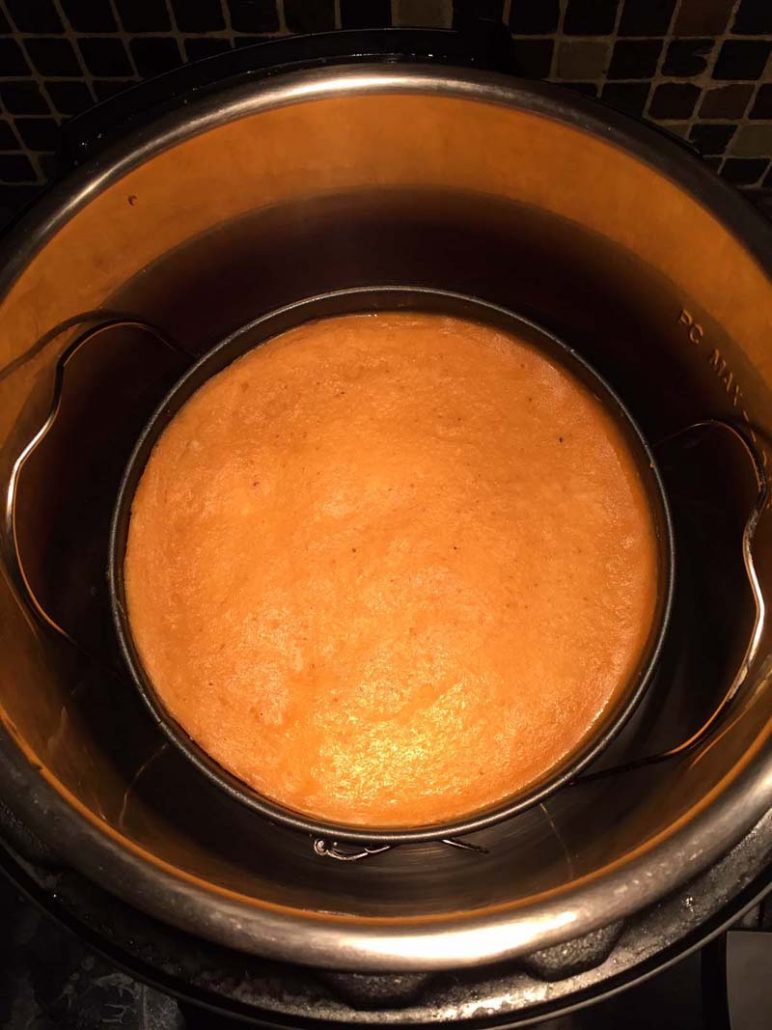
Why no foil cover? If you previously tried baking in the Instant Pot (maybe even my Instant Pot banana bread or Instant Pot cornbread), most recipes have you cover the baking pan with foil to protect from steam. So when I tried making this pumpkin cheesecake in the Instant Pot for the first time, I covered the pan and had a problem: the cheesecake puffed up, touched the foil and the top got messed up! So next time I tried pressure cooking this pumpkin cheesecake without covering it with foil and it was perfect! Nice smooth top has been achieved, and the cooking time has been cut too!
Serving Suggestions
- Top the cheesecake with Low-Carb Whipped Cream for a classic finish and a touch of sweetness.
- Garnish with a sprinkle of cinnamon or pumpkin spice for an extra festive look.
- Serve with a dollop of caramel or Homemade Chocolate Frosting with Chips for added decadence.
- Pair with a cup of Sugar-Free Keto Pumpkin Spice Latte, Comforting Honey Lemon Tea, or Sweet Cinnamon Dolce Coffee for the perfect autumn treat.
- Slice into small portions and serve on a dessert platter alongside other fall favorites like Pumpkin Pie Made in Instant Pot or Healthy Apple Crisp in the Air Fryer.
Tip: most cheesecake recipes call for bringing cream cheese to room temperature. The reason for this is that when the cream cheese is cold, if won’t blend well with other ingredients using a mixer and there’ll be lumps. Well, I never remember to bring cream cheese to room temperature – that’s more planning ahead than I can handle :) So I figured out a workaround – I just put all ingredients in the food processor and it blends everything perfectly, even if the cream cheese is straight from a refrigerator! Therefore, my recipe doesn’t mention the room temperature cream cheese – you can have it at room temp or refrigerator cold, as long as you use a food processor it will be taken care of.
Another tip: if you like to pre-bake your graham cracker crust before adding your cheesecake filling, you can do it right in your Instant Pot! It’s pretty cool, check out my Instant Pot graham cracker crust article for instructions.
If you are looking to make this pumpkin cheesecake gluten-free, use my walnut crust recipe to make the crust instead of the graham crackers! The pumpkin cheesecake filling itself is already gluten-free. Enjoy!
Variations and Substitutions
- Gluten-Free Option: Substitute the graham cracker crumbs in the crust with finely ground walnuts or a gluten-free cookie crumb mix. This provides a crunchy, flavorful base while accommodating dietary needs.
- Dairy-Free Cheesecake: Use dairy-free cream cheese and a plant-based butter alternative for the crust. Ensure the consistency is smooth when blending the filling, and add an extra tablespoon of cornstarch if needed to stabilize it.
- Spice it Up: Add a pinch of nutmeg or ground cloves to the filling for a deeper, spicier flavor. This variation works wonderfully for those who love bold fall flavors.
- Chocolate Pumpkin Cheesecake: Incorporate 1/4 cup of melted dark chocolate into the filling or create a chocolate crust using crushed chocolate wafer cookies. Top with a drizzle of chocolate sauce for a decadent twist.
- Lower Sugar: Reduce the sugar in both the crust and filling by 25% for a lighter version. The pumpkin and spices will still shine through beautifully.
- Mini Cheesecakes: Use smaller ramekins or mini springform pans to create individual servings. Adjust the cooking time to about 10–12 minutes on high pressure, checking for doneness.
- Vegan Pumpkin Cheesecake: Combine soaked cashews, pumpkin puree, maple syrup, and coconut cream in place of traditional filling ingredients. Use a graham cracker alternative for the crust to keep it vegan-friendly.
- Crustless Option: Skip the crust entirely and pour the cheesecake mixture directly into the springform pan. It’s a lighter version that skips the buttery base but still tastes incredible.
Storage and Reheating
- Refrigerator: Store the cheesecake in the refrigerator, covered tightly with plastic wrap or foil, for up to 5 days. This keeps it fresh and prevents it from absorbing any odors.
- Freezer: To freeze, wrap individual slices or the whole cheesecake in plastic wrap, then place it in an airtight container or freezer bag. It can be stored in the freezer for up to 3 months. Thaw overnight in the refrigerator before serving.
- Reheating (Optional): If you prefer a warm slice, heat it briefly in the microwave for about 10–15 seconds. Be careful not to overheat, as the cheesecake can lose its texture.
Frequently Asked Questions
Can I use a different pan size for this recipe?
Yes, but keep in mind that the cooking time will vary. A larger pan may require slightly less time, while a smaller one will need more. Ensure the pan fits comfortably inside your Instant Pot.
What can I use if I don’t have a food processor?
If you don’t have a food processor, a stand mixer or hand mixer can work. Make sure the cream cheese is at room temperature for easy blending to avoid lumps.
Why is there water on top of my cheesecake?
The water is likely condensation from the steam in the Instant Pot. Simply blot it gently with a paper towel before cooling the cheesecake.
Can I make this recipe ahead of time?
Absolutely! In fact, this cheesecake tastes even better after chilling overnight. It’s perfect for making a day or two in advance.
How do I prevent the crust from getting soggy?
Freezing the crust before adding the filling helps it stay firm. You can also line the bottom of the springform pan with foil if you’re concerned about leaks.
Can I double the recipe?
Doubling the recipe is not recommended unless you have a larger Instant Pot and appropriately sized pan. The cooking time would also need adjustment.
Is this recipe suitable for a keto diet?
Not as written, but it can be modified. Replace the sugar with a keto-friendly sweetener and use an almond flour crust to make it keto-friendly.
If you like this Instant Pot pumpkin cheesecake, you will also like these Instant Pot Thanksgiving recipes:
- Instant Pot Banana Bread – got a brown banana? Make this moist and tender banana bread in your Instant Pot! So delicious!
- Instant Pot Cornbread – another Thanksgiving favorite made in the Instant Pot! This cornbread is so golden, tender and fluffy!
- Instant Pot Honey Carrots – baby carrots are cooked in the Instant Pot to perfection and glazed with honey and cinnamon!
- Instant Pot Frozen Turkey Breast – throw in a frozen turkey breast and take out a moist and delicious roasted turkey!
- Instant Pot Gravy – use the juices from the turkey to make delicious homemade gravy right in your Instant Pot!
Instant Pot Pumpkin Cheesecake
Ingredients
CRUST
- 1 cup graham cracker crumbs
- 2 tbsp sugar
- 1/4 tsp cinnamon
- 4 tbsp butter melted
FILLING
- 16 oz cream cheese
- 1 cup pumpkin puree
- 3 eggs
- 1 cup sugar
- 3/4 tsp vanilla
- 1 1/2 tsp pumpkin spice or cinnamon
- 2 tbsp cornstarch
FOR PRESSURE COOKING
- 1 cup water
Recommended Kitchen Tools (click the links below to see the items used to make this recipe)
Instructions
Make the crust
- Spray a non-stick 7-inch springform pan that fits into the Instant Pot with a cooking spray.
- Put the crust ingredients (graham cracker crumbs, sugar, cinnamon and butter) in a food processor and process until combined (about 1 minute).
- Press the graham cracker crumb mixture into the bottom and sides of the springform pan that fits inside the Instant Pot.
- Put the springform pan with a graham cracker crust in a freezer for 5-10 minutes (while making the pumpkin cheesecake filling).
Make the filling
- Put the cream cheese, pumpkin puree, eggs, sugar, vanilla, pumpkin spice and cornstarch in a food processor and process until smooth (about 2 minutes).
- Take the springform pan with a crust out of a freezer and pour the filling into a crust.
Cook pumpkin cheesecake in Instant Pot
- Add 1 cup of water to the Instant Pot and insert the trivet (the rack that came with the Instant Pot) with the handles up. Put the springform pan with the pumpkin cheesecake in the Instant Pot on a trivet. DO NOT cover the springform pan with foil or lid.
- Close the lid of the Instant Pot and turn the valve to a Sealing position. Press the "Pressure Cook" or "Manual" button and set the time to 30 minutes on High pressure.
- When the Instant Pot is done cooking, allow the pressure to release naturally (NR) for 10 minutes, then quick release (QR) the remaining steam.
- Carefully remove pumpkin cheesecake from the Instant Pot (by grabbing the handles of the trivet with heatproof mitts).
- Let the pumpkin cheesecake cool at room temperature for 1 hour, then refrigerate it for at least 4 hours or overnight.
Notes
Nutrition
You will also like:

")


The pumpkin cheesecake came out great
My cheesecake came out with water on top, did anyone else have this problem?
Water is condensation from the steam, if it collects on top of cheesecake, remove it by blotting carefully with a paper towel.
I made this cheesecake with Annie’s gluten free snickerdoodle cookies (accidentally purchased) and it was fantastic!!
I put foil on the bottom of the springform pan so it wouldn’t leak. Top was as smooth as silk. No cracks. Great recipe. Thank you!
I’ve made this cheesecake multiple times. I use an 8 quart instant pot with the official cheesecake pan which I think is about 7.5 inches. The only thing that I have done different with this recipe is increased the crust by 25% because I wanted a thicker crust. This cheesecake is so creamy and it’s so easy because you put everything into a blender. My food processor doesn’t hold enough liquid to be able to put everything in there as the author suggests.
I made this for many dinners. People ask for the recipe and people have asked to take home slices.
I used to dread making cheesecakes because they always cracked or didn’t turn out right. But this Instant Pot pumpkin cheesecake has no cracks, came out smooth, creamy and of course no more complicated oven baking.
I used a healthier graham cracker alternative and reduced the sugar slightly, and the cheesecake still turned out deliciously creamy and flavorful. My wife loved this!