Pineapple Onion Personal Pita Pizzas Recipe
This post may contain affiliate links (disclosure).
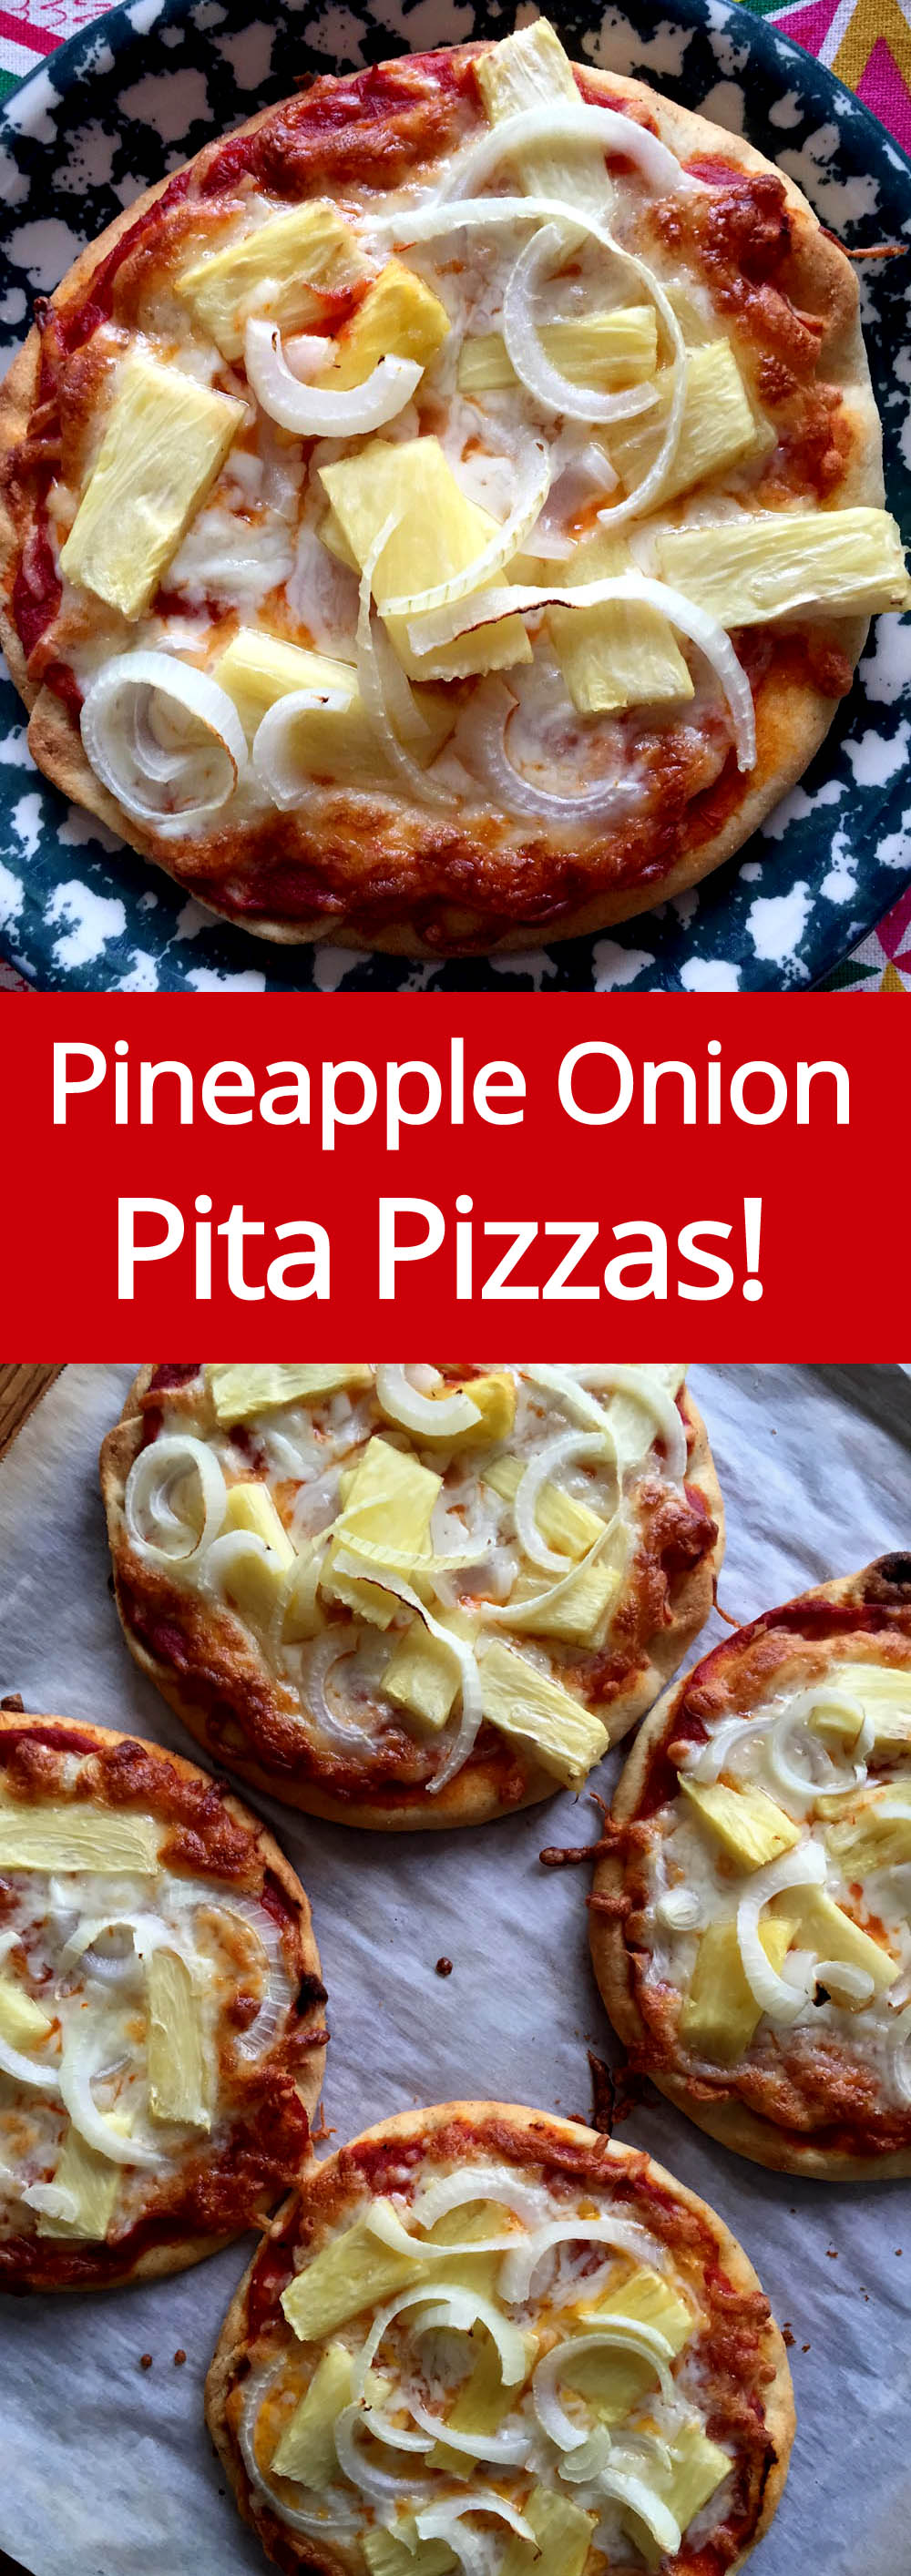
Craving homemade pizza but short on time? These pineapple onion personal pita pizzas are the answer! Perfect for weeknight dinners or a fun snack, this recipe will become a go-to for pizza lovers everywhere.
These personal pizzas are made in just 15 minutes from start to finish! Hot pita bread topped with delicious pizza sauce, melted cheese and exciting pineapple and onion slices – these pineapple onion pita pizzas are always a hit!
Why You’ll Love Pineapple Onion Personal Pita Pizzas
- These pita pizzas are quick and effortless to make, saving you time in the kitchen without sacrificing flavor.
- The combination of sweet pineapple and savory onions creates a unique and irresistible taste.
- Pita bread makes the perfect instant crust—crispy on the outside and soft on the inside.
- They are customizable! You can add your favorite toppings or keep it simple and vegetarian.
- Perfect for busy weeknights, they come together fast and disappear just as quickly!
Pineapple on a pizza? When it comes to using pineapple as a pizza topping, people generally fall into two camps: love it or hate it :) Of course, I’m in the pineapple pizza loving camp! When the pineapple is heated, its taste intensifies and it goes really well with savory dishes. I’m a big fan of savory-pineapple-anything – ever heard of the fried pineapple?
Ingredients For Pineapple Onion Personal Pita Pizzas
- Pita Bread – Acts as a quick and easy personal pizza crust.
- Olive Oil – Adds flavor and helps crisp up the pita.
- Pizza Sauce – Provides the classic pizza base flavor.
- Shredded Mozzarella Cheese – Melts beautifully and brings the cheesy goodness.
- Chopped Pineapple (Canned or Fresh) – Adds a sweet and tangy burst of flavor.
- Onion Slices – Balances the sweetness of the pineapple with a savory touch.
For the exact measurements of the ingredients, see the printable recipe card at the bottom of this article.
Anyway, I think the pineapple pizza topping is awesome, especially when it’s combined with onions! Baked pineapple and onion slices give this pizza such a unique mouthwatering taste, you just feel like you can never get enough! This recipe makes 8 personal pita pizzas, and the reason why I put 4 servings (not 8) is because everyone’s going to want 2 :) When something is so yummy, it’s human nature to get greedy and just want more, more and more!
Pineapple, onion and ham are actually the classic toppings for a Hawaiian pizza, but I prefer the vegetarian pizzas so I leave the ham out. For this recipe, you can use fresh or canned pineapple slices. If you are using fresh, check out my tutorial on how to cut a pineapple – yes, it’s pretty simple if you follow my easy instructions!
Kitchen Tools You Need To Make Pineapple Onion Personal Pita Pizzas
- Baking Sheets – To hold the pita pizzas while baking.
- Parchment Paper – Prevents sticking and makes cleanup a breeze.
- Pastry Brush – For evenly spreading the olive oil on the pita bread.
- Measuring Spoons – To measure out the olive oil and sauce accurately.
- Spoon – For spreading the pizza sauce onto the pita bread.
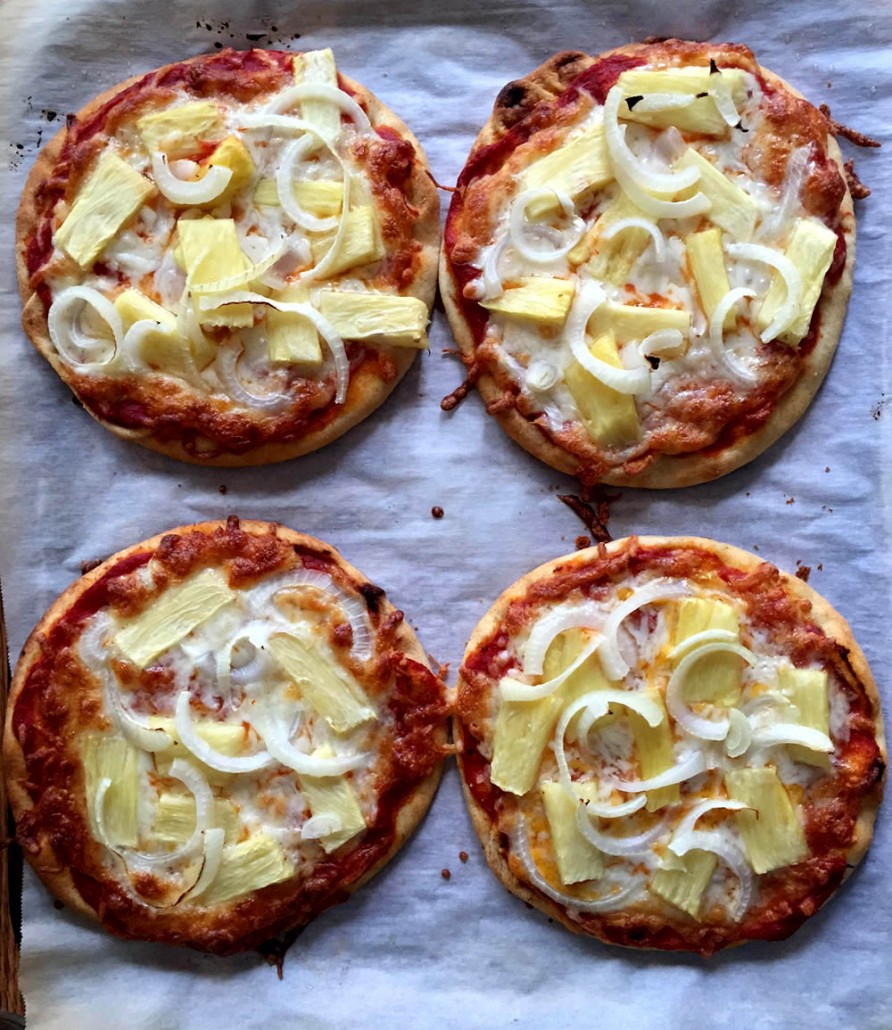
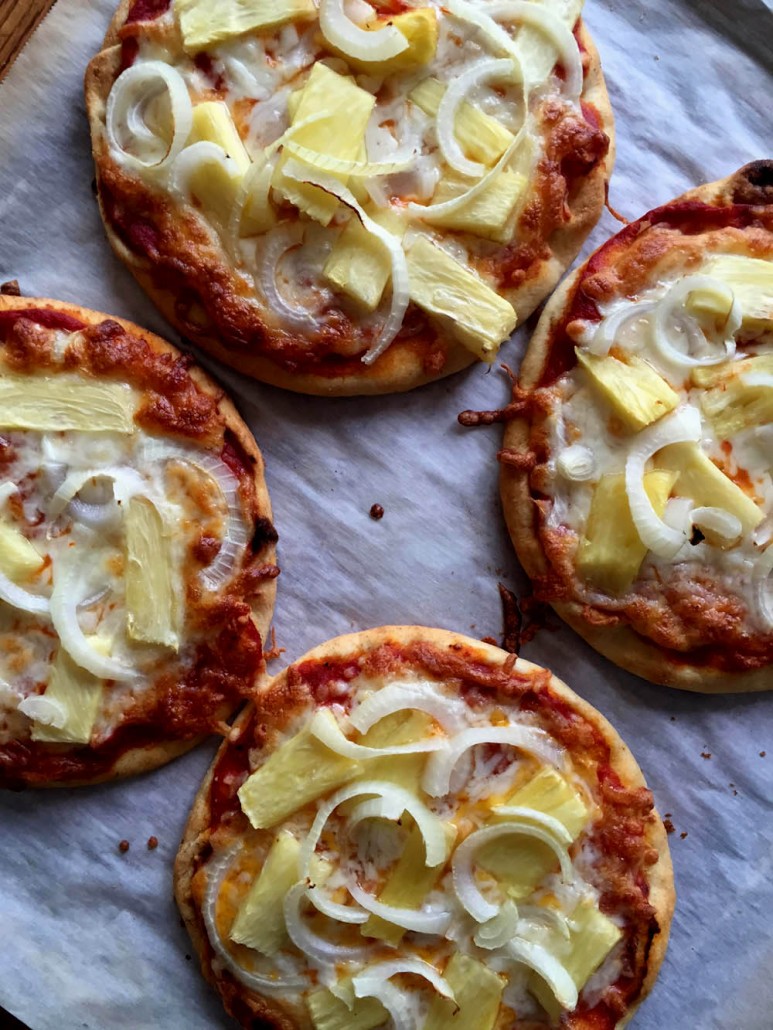
The thing you are absolutely going to love about this recipe is how quick and easy it is to make. This pineapple onion pita pizzas take just 15 minutes to make from start to finish! The secret to such quick and easy personal pizzas is using the purchased pita bread as a pizza crust. Assembling the pita pizzas takes 5 minutes, and then they bake for 10 minutes. This is a perfect weeknight meal to make when you come home from work and everyone is starving. Your family will devour these yummy personal pizzas in seconds!
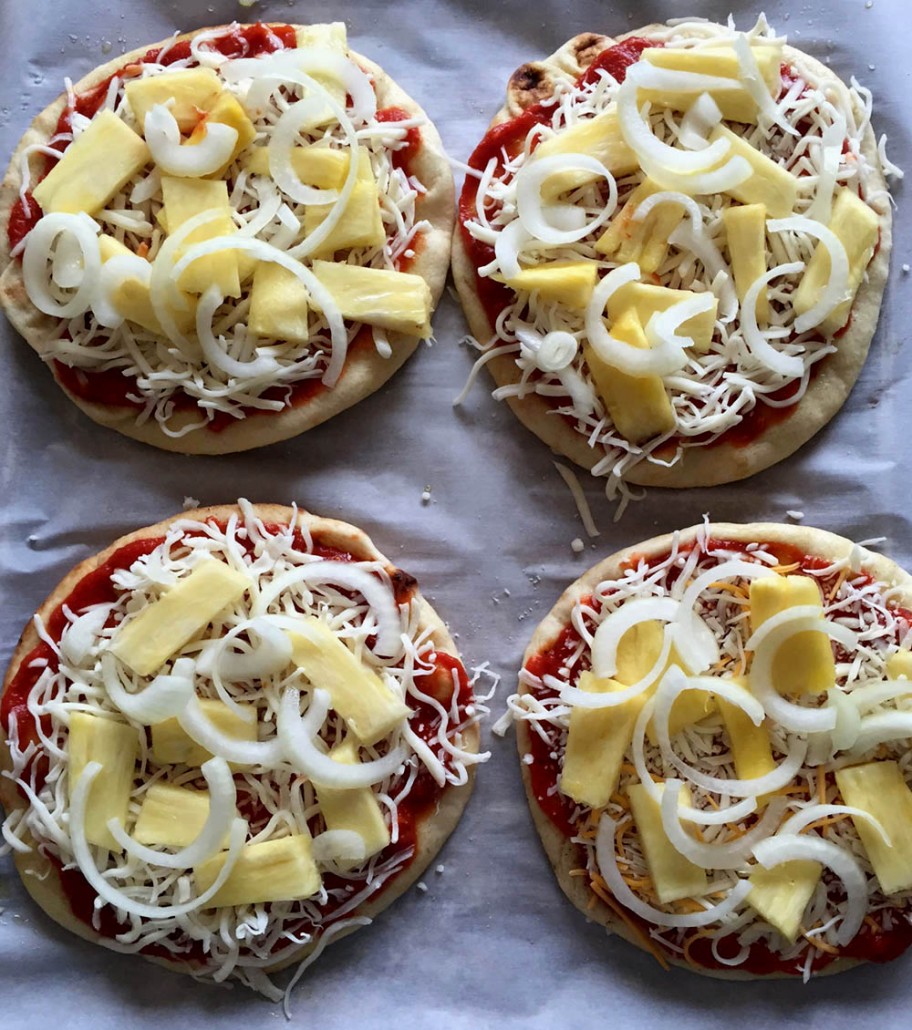
Here’s the picture of assembled pita pizzas – BEFORE they are baked:
How To Make Pineapple Onion Personal Pita Pizzas
- Preheat your oven to 450°F and line two baking sheets with parchment paper.
- Arrange the pita breads on the baking sheets in a single layer.
- Brush each pita with olive oil to give it a golden, crispy base.
- Spread pizza sauce evenly over each pita using the back of a spoon.
- Sprinkle a generous layer of shredded mozzarella cheese on top.
- Add pineapple chunks and onion slices as toppings for a sweet and savory finish.
- Bake in the oven for about 10 minutes, or until the cheese is melted and bubbly.
- Serve your personal pita pizzas hot, and enjoy!
To make the pineapple onion pita pizzas, all you need to do is drizzle the pita with olive oil, spread with tomato sauce, sprinkle with shredded cheese and top with pineapple and onion slices. These pita pizzas only take 10 minutes to bake at high oven temperature! The crust heats, the cheese melts, the pizzas come out and dinner is on the table!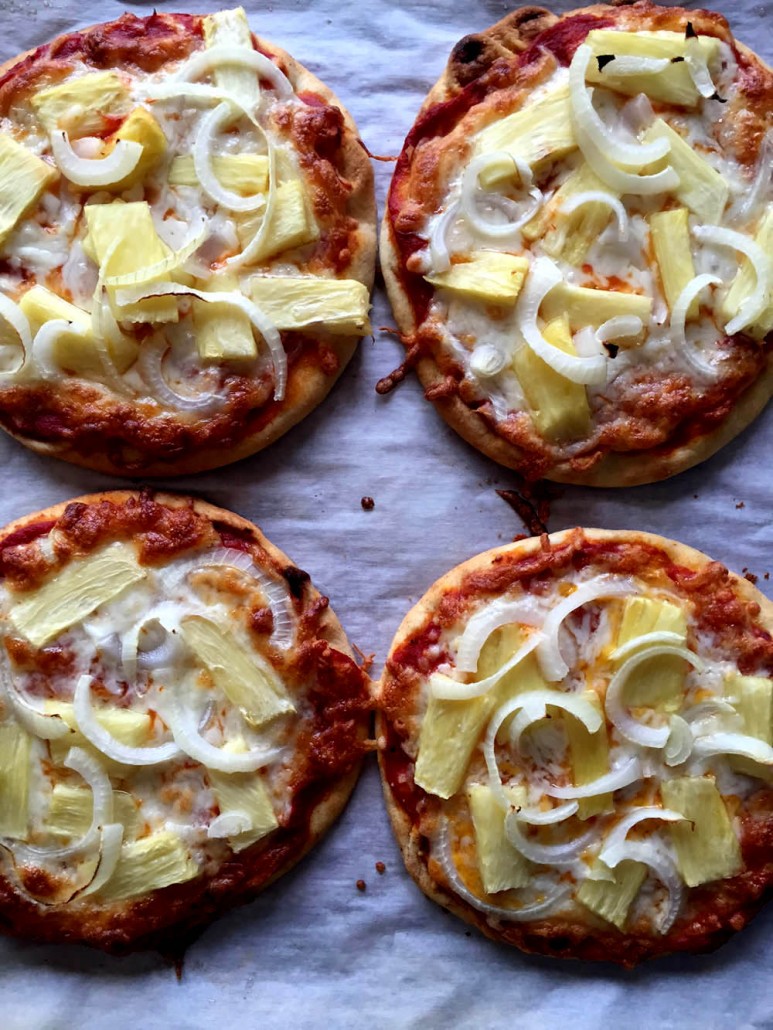
Serving Suggestions
- Serve these pita pizzas hot, straight out of the oven, for the ultimate melty cheese experience.
- Pair them with a side salad, like a crisp Healthy Main Course Salad with Chicken and Avocado or Classic Greek Salad with Tomato, Cucumber, and Feta, for a balanced meal.
- For a fun party platter, cut the pizzas into quarters and serve them as finger food.
- Drizzle a little balsamic glaze on top for an elevated flavor twist.
- Enjoy them with a refreshing drink like Refreshing Homemade Iced Green Tea or Homemade Lemonade with Fresh Lemons for a light and delicious pairing.
Tips For Success
- Use Fresh Ingredients: If possible, use fresh pineapple for a brighter, sweeter flavor, though canned works just as well in a pinch.
- Prep Ahead: Slice your onions and drain the pineapple in advance to save time during assembly.
- Crispier Crust: For an extra-crispy crust, bake the plain pita bread for 2 minutes before adding toppings.
- Even Toppings: Spread your cheese and toppings evenly so each bite is balanced and flavorful.
- Watch the Bake Time: Keep an eye on the pizzas while baking; the high oven temperature can make them go from perfect to overdone quickly.
- Customize Your Pizzas: Add other toppings like bell peppers, olives, or mushrooms if desired, but don’t overload the pita to avoid sogginess.
- Serve Immediately: These pizzas are best enjoyed fresh out of the oven for maximum crispiness and melted cheesy goodness.
Frequently Asked Questions
Can I use fresh pineapple instead of canned?
Yes, you can use fresh pineapple! It adds a brighter and sweeter flavor to the pizzas. Just make sure to cut the pineapple into small chunks for even cooking and a balanced taste in every bite.
What can I use as a substitute for pita bread?
You can use naan, flatbread, or even pre-baked pizza crusts as an alternative. If you need a gluten-free option, gluten-free pita bread works perfectly as well.
Can I make these pizzas ahead of time?
Absolutely! You can assemble the pizzas ahead of time and refrigerate them for up to 8 hours before baking. Just cover them tightly with plastic wrap or foil to keep them fresh.
How do I prevent the pita from getting soggy?
To keep the pita crispy, pat the pineapple chunks dry before adding them. You can also bake the plain pita for a couple of minutes before adding the toppings.
Can I make this recipe vegan?
Yes! Substitute the mozzarella cheese with your favorite plant-based cheese and make sure to use a vegan-friendly pizza sauce.
What is the best way to customize these pizzas?
You can add your favorite toppings, like bell peppers, mushrooms, or olives, or include some protein like cooked chicken or pepperoni. Be sure not to overload the pita to prevent sogginess.
What temperature should I bake the pizzas at if I want a crispier crust?
The recipe calls for 450°F, which is perfect for a crispy crust. If you’d like it even crispier, you can bake the pita alone for 2-3 minutes before adding the toppings and baking again.
Can I cook these pizzas in an air fryer instead of the oven?
Yes! Preheat your air fryer to 400°F and cook the pizzas for about 5-7 minutes or until the cheese is melted and bubbly.
How many servings does this recipe make?
This recipe makes 8 personal pizzas, but it’s perfect for 4 servings since everyone typically loves having two!
What side dishes go well with these pita pizzas?
A crisp side salad, roasted vegetables, or even some garlic bread are excellent choices to serve alongside these pizzas.
Other Easy Pizza Recipes
Easy Cheesy Garlic Pizza – Quick Crispy Dinner Recipe – This cheesy garlic pizza combines bold flavors and a perfectly crispy crust for a delicious dinner in just minutes.
Naan Pizza in the Air Fryer – Transform naan bread into a quick, crispy personal pizza in your air fryer with your favorite toppings.
Crescent Roll Pizza Bites – These bite-sized crescent roll pizzas are stuffed with gooey cheese and sauce, perfect for snacks or parties.
Frozen French Bread Pizza in the Air Fryer – Enjoy perfectly crispy and cheesy French bread pizza straight from the freezer with this air fryer method.
Tortilla Pizza with Mexican Flavors – This tortilla pizza brings Mexican-inspired toppings to a crispy, thin crust for a fun fusion meal.
Low-Carb Eggplant Pizza (Gluten-Free Option) – Swap the crust for eggplant slices and enjoy a healthy, low-carb twist on classic pizza.
Square and Rectangle Pizza Recipe – Make perfectly shaped square or rectangular pizzas with crispy edges and endless topping possibilities.

Pineapple Onion Personal Pita Pizzas Recipe
Ingredients
- 8 pita breads
- 1 tbsp olive oil
- 1 can 8 oz pizza sauce
- 1 package 8 oz shredded mozzarella cheese
- 1 can 8 oz chopped pineapple, drained
- 1 small onion sliced
Recommended Kitchen Tools (click the links below to see the items used to make this recipe)
- baking sheets
- Pastry Brush
Instructions
- Preheat the oven to 450F.
- Line 2 baking sheets with parchment paper.
- Put the pita breads on the baking sheets in a single layer (4 pitas per baking sheet).
- Drizzle the pitas with olive oil, then brush the oil over them to coat.
- Spoon the pizza sauce on top of the pitas (divide it evenly among the pitas). Spread the pizza sauce over the pitas with the back of a spoon.
- Sprinkle the cheese evenly over the pita pizzas.
- Put the pineapple chunks on the pita pizzas.
- Top the pita pizzas with the onion slices.
- Put the pita pizzas in the oven and bake for 10 minutes.
More Baked Recipes
- Cheesy Baked Salmon with Mayo
- Mardi Gras King Cake Recipe with Air Fryer Cinnamon Rolls
- Instant Pot Dessert Bread Pudding


")


I always love pineapples on my pizza. These mini ones are so delicious!
So delicious! 😋🍕
Pita bread makes such a great pizza base.